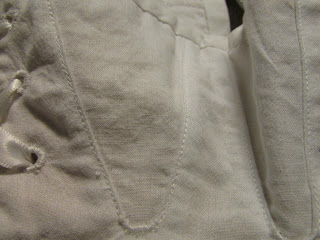
Regency Short Stays
The first addition to my 2022 Regency Ensemble Project is the short stays. These were worn by women to encourage and accentuate the much-desired, columnar figure. There are many wonderful posts done by others on the origin of the short stays, as well as the different variations of them.
Drafting the Pattern
I know I said I was going to use the Redthreaded short stays pattern, but in the end, I decided on drafting my own from instructions instead. (This was mostly because I was bored over Christmas and couldn't bring myself to wait for the pattern to be shipped). I used the same pattern drafting instructions I used to make my first pair of stays (and first Regency project ever).
I've found over both times using them that the pattern instructions I used are very helpful for the foundation of the pattern, but, at least in my experience, need to be tweaked quite a bit to make the finished result. Now, when using pattern instructions provided by someone else, constructed with their specific measurements, this is to be expected to some extent. I would just advise having a very clear idea of what you would like your stays to look like and making adjustments from there. Overall, however, I cannot say I would have been able to draft the stays without the instructions and do recommend them if you plan on attempting your own.
The Tweaks
I changed the original pattern to be a few (2) inches longer than the original pattern suggested, lengthening the gussets to coincide with the new measurements. Additionally, I adjusted the armscye to be a bit wider. I found fairly consistently that my measurements caused my pattern to have a slight difference in shape, creating inconsistencies when it was time to draft the gussets. I worked around this by guesstimating ratios and reapplying them with my own measurements. Looking back, I wish I had done more mock-ups and fittings to make sure the gussets were the right size, as they turned out a tad big on top. I also removed the protruding tabs the original pattern had called for to connect the front part of the strap to the back part of the strap. I did this to avoid binding more curves.
Construction
After some mock-ups, I began the stays by cutting the pattern pieces from two layers of a simple white cotton, and one layer of unbleached cotton drill. I considered using canvas for this layer (for extra strength), but after hearing the story of my grandma attempting to sew a sailboat sail (it did not end well), I decided against it.
The gussets (cue traumatic memories) should have been easy considering it was my third time. This assumption, however, proved untrue. I sewed twelve gussets in total, completing each layer of fabric individually so I could baste them together later on. If you or someone you know is struggling with gusset failure, or feelings of inadequate gussets, know that yes, that last bit of frayed edge at the bottom center will definitely always be there. My solution to this, as well as any other problems that might arise, was stitching over it. I added reinforcement stitches to the problem areas. I will insert a link here to a good gusset tutorial.
After completing all three layers of the stays, I basted them together by hand. This made them easier to bind. I then inserted my plastic boning (true historical accuracy in this case was illegal) and connected the back straps to the back pieces with flat felled seams.
Once I had done this, it was time to hand stitch the bias binding. I chose to go forego the machine for this particular step because I wanted it to look as clean as possible. My only regret with the binding was not being more careful on the curves and mitered corners, as they turned out a bit bunched. I was originally going to use a ready-made bias binding, however, like almost all good things, it contained polyester. I purchased a yard of white cotton and made my own. (I later discovered that the thread I was using also contained polyester, but we are going to pretend, for the purposes of my continued sanity, that this was not the case) (apparently, I decided to overlook machine stitching).
After the binding was added, I handstitched the eyelets. Because the back straps are not connected to the front of the stays, there ended up being sixteen. A good eyelet sewing tutorial can be found here. I used two strings of embroidery floss.
The End Result
I like the 2022 version of my short stays the best. Lack of a thimble did result in some bloodstains (I'll have to find a tutorial for removing those, as well) but they are small.


